Showing posts with label polished. Show all posts

Friday, September 5, 2014

Twinkie Nail Art Challenge - Nude & Teal Floral Stamped Mani

I decided a few days too late that I would have liked to join the 31 day mani challenge. Luckily I stumbled upon another gem of a nail art challenge, which involves only one mani per week - definitely doable! 

The #twinkienailartchallenge is hosted by @spilledmilknails and @polishedbybeckie on Instagram. The first theme of the month is a teal mani for ovarian cancer awareness. At first I had a different vision involving a dark on light lace stamped mani. The more I thought about it though, the more I decided it was high time to use my princess collection plate 09 from MoYou - the first pattern I fell in love with! 

Nude & Teal Rose Stamped Mani MoYou

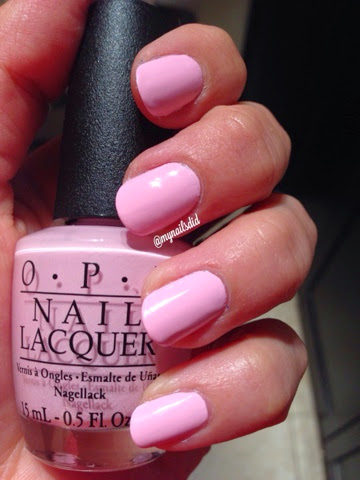
I decided to pair the delicate rose pattern with a more neutral base, and settled on one of my favourite (ok, only) nudes which is OPI Barefoot in Barcelona. I just love it, it goes on smoothly with a gorgeous creme finish. Rimmel's Do Not Disturb provided the perfect pop of colour and proved to be a great stamping polish too! I'll have to grab more colours from that collection. 

Nude & Teal Rose Stamped Mani MoYou

Wanting to be a bit more creative than another full nail stamping mani, I used scotch tape to divide my nail in half on the diagonal. A great tip I found from a defunct blog (Chloe's Nails) suggested sticking the tape to the back of your hand a couple of times so it was less likely to wreck your base (which I let dry super well anyways!). After prepping the stamp, I applied the tape and stamped to minimize the amount of time the tape was on the nail, working one nail at a time. 

Nude & Teal Rose Stamped Mani MoYou

I used a liner brush to paint a thin line of the teal polish to make the pattern really stand out. Lastly, I finished with a coat of HK girl top coat. Voila! This was so fun and I am looking forward to the rest of the challenge for more inspiration! 


xo Shawna 

Wednesday, September 3, 2014

Pastel & Holo Nail Polish Swatches

I was able to get great prices on a few shades I've had my eye on. I had told myself no new polishes until September, so I ended up with a mini haul today! Now the question is - can I wait until October for more? Totally addicted.

I ended up with:
OPI Avoplex cuticle treatment pack 
China Glaze Be More Pacific 
China Glaze Fairy Dust
OPI Mod About You
Minis: Seche Vite Dry Fast Top Coat and CND Solar Oil
Finger Paints Striping Polish: Ch-art-coal Black & Hip Hip Hue-Ray 

Onto the swatches! 
First up... Mod About You. I was searching for a dupe for my favourite pink polish, panda-monium pink (as seen in my romantic stripes & sparkles mani). 
The formula was a little thick, so after two coats it was mostly opaque but slightly streaky in a few areas. I smoothed it out with a Ciate top coat. I love the colour - I've been wanting a true pastel pink for my collection and this definitely fits the bill. As for a panda-monium pink dupe, it's close but not quite there. PMP has a blue undertone giving it a slight lavender hue. 


Another polish that has been on my list is a Be More Pacific. To be honest the colour didn't draw me at all- this one was all about the name! It's a bit of an inside joke with my fiancĂ© and I. 

I'm not generally attracted to green as a polish shade but I do have a few in my collection. This one was a pleasant surprise! It's a light pastel green even leaning very slightly towards yellow. This would make a great spring colour. The formula applied well, albeit a little sheer. After two coats there was still visible nail line, and after the 3rd coat a few tiny bubbles appeared- so be sure to let this one dry very well between coats! 


Lastly, I've been coveting a holographic top coat. After some research, I found Fairy Dust as the most affordable option. I'd love to get my hands on Cult Nails Mayhem, but it is nearly 4x the cost so this was a great compromise! 

The formula was easy to apply and dried reasonably quickly. Top to bottom: 3 coats, 2 coats, 1 coat (and no coat) over PMP. The pics don't do the sparkle justice at all, but you can get a sense of the density of the glitter. This will go into my regular glitter rotation for sure, especially until I get some proper holographic polishes! 


Top to bottom: nothing, 1 coat, 2 coats, 3 coats. 


Overall, I'm digging all of the new colours despite a few minor formula flaws - they're worth dealing with to me. 

How do you like the pastel polishes? 

xo Shawna 

Sunday, August 24, 2014

Birds on a Wire Stamped Mani

Tonight's mani has booted out my Paris nails as my new favourite! As soon as I saw the Birds on a Wire on the MoYou Pro Plate #4 I knew it was a must have. The only thing that prevented me from using it earlier was a fear of the fine line work, so I wanted more practice first! 

Birds on a wire Ombre Stamped Mani

First, I created a gradient with:
China Glaze - Naked
L'oreal - Orange You Jealous
Sally Hansen - Pacific Blue
I was going to use an Essie shade in lieu of Pacific Blue but the colour was just too sheer to be really noticeable and I wanted more.

Birds on a wire Ombre Stamped Mani

Next, I used Wet n' Wild Black Creme for the stamping. I paired the delicate (illegible) text from the same plate with the bird image.

Birds on a wire Ombre Stamped Mani

I absolutely love the way this one turned out. The ombre effect on my thumbs are less than perfect - I figure my thumbs are kind of like the first pancake - a write off. 

Birds on a wire Ombre Stamped Mani

Do you have issues getting your thumbs sponged as nicely as the rest?

xo Shawna

Sunday, August 17, 2014

green mani Sunday

Happy Sunday everyone!

There is a green theme going around the nail instagram feed today, to support depression awareness in light of the recent passing of Robin Williams. If you search the hashtag #fightforlightandlive, you'll find a whole bunch of IG'ers who have painted their nails green today!

As I posted a few days ago on Facebook, I hope the positive that comes from the tragic event of a few days ago is to bring awareness to depression. If you are depressed, or even just not feeling like yourself and can't quite pinpoint it, you can ALWAYS ask for help - whether it be a family member or friend, or reaching out for support to a support line. Find a list of all the Canadian hotlines here.

To lighten things up, on to today's mani!

I've combined safari green with a leafy stamp, for a very nature inspired look!

green leaves nature inspired stamping manicure

The base colour is L'Oreal "Safari Chic". This was my first time using this new (to me) polish, and I was really impressed with the coverage of just one coat (as pictured). 

green leaves nature inspired stamping manicure

The white is Ciate "Snow Virgin". This is my first time using it to stamp, and again I'm impressed with the coverage from the polish. 

green leaves nature inspired stamping manicure

Don't be fooled by the bottle in the pic, I actually used HK Girl Top Coat. I had just packed away all my polish supplies when I redid the pics, and this bottle is being donated to my sister so it was readily available for a photo op!

Also, I am really having issues getting crisp photos, so hopefully you get the point. 

There you have it. Hope you had a great weekend!

xo Shawna

Thursday, August 14, 2014

silver & roses nail stamping manicure

So, after my MoYou plates arrived last night I immediately set to work practicing. My first few attempts weren't great until I remembered reading somewhere it helps to prep a new stamper by lightly buffing the surface with a nail file. So, I did that and voila! Stamping magic was happening. I had a really hard time not only choose which image(s) to stamp for my first mani, but which colours. I settled on using my new shade "Butterfly Kisses" by L'Oreal (as pictured in yesterday's post) and stamping with my Sally Hansen "Hi-Ho Silver" that you may remember from my galaxy nails

Silver & Roses Stamping Manicure

I used two rose patterns from the MoYou Pro Plate 04 and alternated nails. One is a rose pattern and the other is the same pattern in the negative. 

Silver & Roses Stamping Manicure

It's really hard to capture the details with the silver being so reflective, but I love the way it turned out. The roses seem really delicate in the pink and silver shades. 

Silver & Roses Stamping Manicure

And of course, I topped it off with my new HK Girl topcoat. It's too early to make and solid judgements, but it definitely dried fast and didn't get any imprints when I went to bed later. (Conversely, I just had to chuck my old bottle of Seche as it's completely gummed. I considered buying a replacement bottle since I found it for about $6 at Winners, but decided it was unnecessary with having HK Girl). 

What do you think?

xo
Shawna


Wednesday, August 13, 2014

Nail Mail - MoYou London Stamping Plates!

So I've gone a little overboard the past week or two with online shopping, since I discovered the world of nail art and stamping specifically! The packages have already started to roll in. I'm really impressed with the shipping times of nail polish canada and MoYou London! I also snagged some awesome deals on L'Oreal polish at best buy online of all places, half of which shipped super quick and oddly the other half I'm still waiting for.

nil mail moYou stamping & loreal

Here are the goodies! Top to bottom I have HK Girl Top Coat, which was shipped for free from Nail Polish Canada. It cost few dollars more than purchasing directly from the buyer, but the free shipping more than made up for the difference since I only wanted the one item. I've just used it for the first time so I don't have an opinion yet (other than it does seem to dry quickly!) but loads of other nail bloggers and 'grammers have raved about it, so I jumped on board. The L'Oreal polishes are Orange You Jealous, Butterfly Kisses and Because You're Worth It. I got 4 MoYou plates from different collections, as well as the XL double sided stamper. I think for my nail length, the XL is unnecessary but I liked the double sided-ness - it let me work back and forth before cleaning each side, so the stamping process seemed to flow more smoothly. Check out the plates up close. They are gorgeous!

MoYou London Nail art Stamping Plates

Explorer Collection 21 

MoYou London Nail art Stamping Plates

Princess Collection 09 

MoYou London Nail art Stamping Plates

Pro Collection 04 


Tourist Collection 21

MoYou London Nail art Stamping Plates

I'm curious to receive my stamper from the born pretty store, (affiliate link) to see how the firmer one compares to the squishy XL stamper. What stamping plates and stampers have you tried? What's your favourite brand?

xo
Shawna

Monday, August 11, 2014

silver galaxies nail art manicure

While I anxiously await all of my nail goodies from the born pretty store, I have been starting to get creative with my nail painting. Enter galaxy nails! I followed a nail tutorial from The Hunt. I decided to do one nail on each hand since it was my first attempt, and also to save time since I was focusing on getting my blog up and running tonight! 


Colours used:
Color Club: Poptastic collection (my minis are unlabelled); Nicole : My Lifesaver; Sally Hansen (Complete Manicure): Hi Ho Silver; ACo: Snowfall; Ciate - Chinchilla
Top coats: China glaze matte magic & No Chop Top Coat

Silver galaxy manicure nail art

I decided to use my new silver shade on all the other nails. Can I talk about how much I love this polish? It's Sally Hansen complete manicure in Hi-Ho Silver, and I snagged the bottle on clearance for $2 at Target tonight! One coat had great coverage but I did two coats anyways. It also served as the final touch on the accent nails since I somehow own no silver glitter polish (I must remedy that ASAP!)

Silver galaxy manicure nail art

I love the way they turned out and I can't wait to do a full mani using the technique.

Silver galaxy manicure nail art

Tell me, have you tried the galaxy nails technique before?

Have a great night!

(note, post contains affiliate links)

Welcome to my blog!

Hi everyone! Welcome to my little corner of the web and my first blog post. I've always loved nail art and recently discovered the world that is nail blogging (and instagramming!). So I decided to join all the awesome bloggers and share my own inspirations and creations.

About me, I am in my late 20s and live outside of Toronto, Ontario. I have loved painting my nails since I was old enough, and used nail art as a way to break the ice when I moved schools in grade 7, so it's always been something I loved! I've also always had a little bit of a nail polish collection (keeping it around 30-40 shades by periodically destashing!) and thought nothing of it. I have just discovered a few awesome online nail supply stores so my collection of polish and nail art supplies will soon be rapidly expanding! More to come on that later.

Please comment and follow - I look forward to meeting you all! I'm also on instagram as @mynailsdid - see you there!

Shawna
 
Images by Freepik