Showing posts with label manicure. Show all posts

Sunday, November 23, 2014

Sweater Nails

This was a fun mani because I didn't have to do it myself! One of my friends owns a salon/spa in town and had mentioned she would like to learn stamping to be able to provide a quick nail art service to her clients. In exchange for my teaching services, I scored a free mani and also a blowout. No complaints over here :) 


Products used
CND Vinylux Rock Royalty
BK Matt White
MoYou Festive 06


I love both the polish colour (I want to find a non-vinylux dupe!) and the stamps. I love the way the one sweater design looks on an angle (my middle finger). I am already imagining the snowflakes over a glittery blue base. So many ideas, so little time! 


Do you like the sweater nail trend?

xo Shawna


Saturday, September 27, 2014

Echoes Polish Indie Swatches

Today, I have my first swatch post for you! I've been wanting to purchase some indie polishes since I got into this whole nail art thing more seriously, but found the shipping costs a little bit prohibitive. So, I decided the more I bought, the better the value ;) I wanted my first few indie purchases to support Canadian, so I placed orders with Echoes Polish and My True Love Creations! Both orders came super quickly, and I received them in less than a week. Today, I'm swatching some of my new polishes from Echoes Polish!

My Nails Did; Echoes Polish Indie Nail polish haul
Pink Freud, Barely There, Spearmint-Away, Life is a Caberet, and Fracken.
I'll get right to the swatches. I chose two shades from the "I'm Pretty Neutral" Collection, Barely There and Spearmint-Away, and a jelly shade, Pink Freud. 

My Nails Did; Echoes Polish Barely There Swatch

Barely there is the perfect name for this gorgeous, light sheer nude shimmer. I had seen this collection swatched over a white base, so I showed that on the accent nail. As a stand alone, this would be a perfect French mani topper or for something really simple and classy. For a bit of pop I love it over the white base! This is two coats. 

My Nails Did; Echoes Polish Spearmint Away Swatch

Spearmint-Away is a lovely sheer green shimmer. This is 3 coats, which gave it a more opaque look. I really love this colour and think it's perfect for fall. It will also really pop over a white base!

My Nails Did; Echoes Polish Pink Freud Swatch

This is Pink Frued, a lovely raspberry hued jelly. This is shown with 3 coats, and would become even more opaque with one more. This is going to be a great shade to create "jelly sandwich" manis with glitter or stamping! I can't wait to get creative with this one. 

I will save my final three swatches for another post... the Echoes Polish Mystery Bag! You can see some of the choices in the first pic... full sized swatch pics coming tomorrow :) 

Are you on the indie polish bandwagon? Who are your faves?

xo Shawna

Friday, September 19, 2014

Floral & Stripes - Nail Art Challenge Week 3

Today is week 3 of the #twinkienailartchallenge and the theme is floral. This was perfect because I've been wanting to create some floral nail designs but have been worried that I didn't know how and they wouldn't turn out! It was a great opportunity to be drawn out of my comfort zone. 

My Nails Did: Floral & Stripes Manicure

Browsing bloglovin for inspiration, I found a tutorial from wondrously polished on a pretty floral design. It was on a black base, however I wanted to use my new finger paints polish and keep it light and fresh for the last few days of summer. 

My Nails Did: Floral & Stripes Manicure

Polishes used:
Base
Finger Paints Natural Talent
Flowers
OPI - red mini
OPI Mod About You
Ciaté Snow Virgin
Loreal Safari Chic
China Glaze Tree Hugger
Toppers
China Glaze Fairy Dust
HK Girl Top Coat 

My Nails Did: Floral & Stripes Manicure


Initially I striped the index finger as well, but I didn't like it. The nude on it's own was a little plain so I jazzed it up with a red rhinestone from born pretty store (it's true red IRL, the photos made it look orange!) and a swipe of holo topper. I'm pretty pleased with the result of my first floral mani! 

Do you stick to tried and true designs or venture into new design territories often? 

xo Shawna 

post contains affiliate link

Friday, September 12, 2014

Saran Wrap & Chevron Mani

Today marks week two of the #twinkienailartchallenge. The theme was Saran Wrap mani, which is something I've never tried before - and I was pleasantly surprised with how easy it was! I had also received my nail decals from Up Your Nail and was excited to try out the large chevrons. Her prices are great so check them out if you're after some decals. 

I started with a base of Lilacism and wasn't too sure where to go from there. I decided on a soft and sparkly look with pastel pink and gold. 

My Nails Did: Saran Wrap & Chevron Mani

The polishes used:
Essie Lilacism
OPI Mod About You
Loreal Because You're Worth It (saran wrap)
OPI Love.Angel.Music.Baby (accent tips)
Ciate Fast Dry Top Coat
China Glaze Matte Magic

My Nails Did: Saran Wrap & Chevron Mani

My Nails Did: Saran Wrap & Chevron Mani

My Nails Did: Saran Wrap & Chevron Mani

What do you think of the saran wrap look?

xo Shawna

Nothing to disclose

Tuesday, September 9, 2014

Orange and Green Tribal Stamped Mani

Tonight's manicure was a quickie! As much fun as I had creating the last hand painted tribal set of designs, it was just too busy for my everyday wear. I also got my new plates from born pretty store yesterday and I couldn't wait to test them out! 

For the mani, i used:
born pretty nail art plate (item 6947) - use code SDPX31 to save 10%!
China Glaze Tree Hugger
L'Oreal Orange You Jealous
Wet n' Wild Black Creme
Ciate Fast Dry Top Coat

My Nails Did: Green & Orange Tribal Stamped Mani

I need a little practice still getting the images onto the nail straight! Luckily its workable for this design.

My Nails Did: Green & Orange Tribal Stamped Mani

Only one of the nails got a little messed up while stamping. Overall I am really pleased with the quality of the plates! 

My Nails Did: Green & Orange Tribal Stamped Mani

Do you like the design?

xo Shawna

(disclosure: post contains affiliate link)

Sunday, September 7, 2014

Neon Tribal Inspired Nails

Happy Sunday everyone! Today I'm excited to share the fun manicure I created that has been in my mind for a while. Tribal (geometric) manicures are remaining a popular trend in the nail art world and I couldn't wait to jump on board. I bought black and white striping paints the other day and I decided I was ready to take on a whole manicure inspired by tribal prints!

For ideas, I googled "Tribal Print" and I had a few ideas already tucked away in my mind. My favourite nails are the design on my right thumb/ left middle finger, and the design on my left thumb/ right index finger!

Neon Pool Party Tribal Geometric Manicure

Neon Pool Party Tribal Geometric Manicure

To create this look, I used:
China Glaze Pool Party 
Finger Paints Hip-Hip-Hue-Ray!
Finger Paints Ch-Art-Coal Black
HK Girl Top Coat

Neon Pool Party Tribal Geometric Manicure

Neon Pool Party Tribal Geometric Manicure

Are you on board with the tribal trend? Which designs are your favourite?

xo Shawna

Friday, September 5, 2014

Twinkie Nail Art Challenge - Nude & Teal Floral Stamped Mani

I decided a few days too late that I would have liked to join the 31 day mani challenge. Luckily I stumbled upon another gem of a nail art challenge, which involves only one mani per week - definitely doable! 

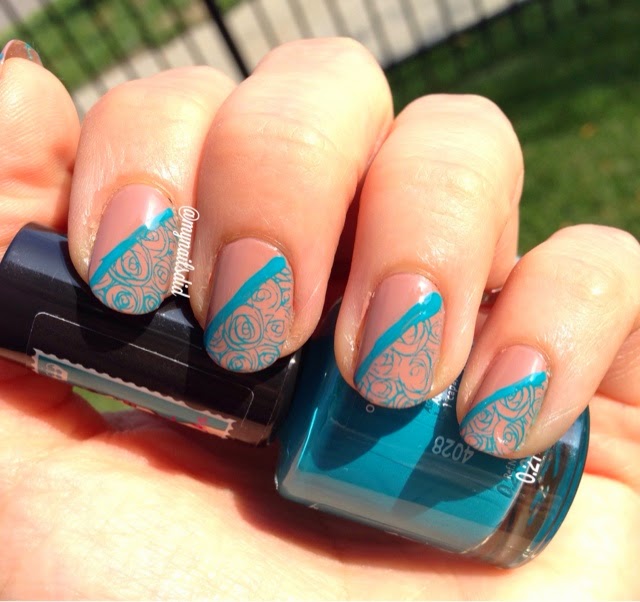
The #twinkienailartchallenge is hosted by @spilledmilknails and @polishedbybeckie on Instagram. The first theme of the month is a teal mani for ovarian cancer awareness. At first I had a different vision involving a dark on light lace stamped mani. The more I thought about it though, the more I decided it was high time to use my princess collection plate 09 from MoYou - the first pattern I fell in love with! 

Nude & Teal Rose Stamped Mani MoYou

I decided to pair the delicate rose pattern with a more neutral base, and settled on one of my favourite (ok, only) nudes which is OPI Barefoot in Barcelona. I just love it, it goes on smoothly with a gorgeous creme finish. Rimmel's Do Not Disturb provided the perfect pop of colour and proved to be a great stamping polish too! I'll have to grab more colours from that collection. 

Nude & Teal Rose Stamped Mani MoYou

Wanting to be a bit more creative than another full nail stamping mani, I used scotch tape to divide my nail in half on the diagonal. A great tip I found from a defunct blog (Chloe's Nails) suggested sticking the tape to the back of your hand a couple of times so it was less likely to wreck your base (which I let dry super well anyways!). After prepping the stamp, I applied the tape and stamped to minimize the amount of time the tape was on the nail, working one nail at a time. 

Nude & Teal Rose Stamped Mani MoYou

I used a liner brush to paint a thin line of the teal polish to make the pattern really stand out. Lastly, I finished with a coat of HK girl top coat. Voila! This was so fun and I am looking forward to the rest of the challenge for more inspiration! 


xo Shawna 

Wednesday, September 3, 2014

Pastel & Holo Nail Polish Swatches

I was able to get great prices on a few shades I've had my eye on. I had told myself no new polishes until September, so I ended up with a mini haul today! Now the question is - can I wait until October for more? Totally addicted.

I ended up with:
OPI Avoplex cuticle treatment pack 
China Glaze Be More Pacific 
China Glaze Fairy Dust
OPI Mod About You
Minis: Seche Vite Dry Fast Top Coat and CND Solar Oil
Finger Paints Striping Polish: Ch-art-coal Black & Hip Hip Hue-Ray 

Onto the swatches! 
First up... Mod About You. I was searching for a dupe for my favourite pink polish, panda-monium pink (as seen in my romantic stripes & sparkles mani). 
The formula was a little thick, so after two coats it was mostly opaque but slightly streaky in a few areas. I smoothed it out with a Ciate top coat. I love the colour - I've been wanting a true pastel pink for my collection and this definitely fits the bill. As for a panda-monium pink dupe, it's close but not quite there. PMP has a blue undertone giving it a slight lavender hue. 


Another polish that has been on my list is a Be More Pacific. To be honest the colour didn't draw me at all- this one was all about the name! It's a bit of an inside joke with my fiancé and I. 

I'm not generally attracted to green as a polish shade but I do have a few in my collection. This one was a pleasant surprise! It's a light pastel green even leaning very slightly towards yellow. This would make a great spring colour. The formula applied well, albeit a little sheer. After two coats there was still visible nail line, and after the 3rd coat a few tiny bubbles appeared- so be sure to let this one dry very well between coats! 


Lastly, I've been coveting a holographic top coat. After some research, I found Fairy Dust as the most affordable option. I'd love to get my hands on Cult Nails Mayhem, but it is nearly 4x the cost so this was a great compromise! 

The formula was easy to apply and dried reasonably quickly. Top to bottom: 3 coats, 2 coats, 1 coat (and no coat) over PMP. The pics don't do the sparkle justice at all, but you can get a sense of the density of the glitter. This will go into my regular glitter rotation for sure, especially until I get some proper holographic polishes! 


Top to bottom: nothing, 1 coat, 2 coats, 3 coats. 


Overall, I'm digging all of the new colours despite a few minor formula flaws - they're worth dealing with to me. 

How do you like the pastel polishes? 

xo Shawna 

Monday, September 1, 2014

Purple Ombré Stamped Mani

I was envisioning a purple hued mani when I sat down this afternoon (yay for stat holidays!). I don't actually have a ton of purple shades so I used a base of Essie "Lapiz of Luxury", and used a sponge to create a gradient effect with China Glaza "Grape Juice" and my mini Color Club in neon purple. The Grape Juice has a heavy undertone of silver micro glitter, and the colour effect reminds me of royalty with the sparkly purple ombré!

purple ombre chain link lace stamped manicure

I used a born pretty store stamping plate (item 6450) with Ciate "Snow Virgin" to create a lacy, almost chain-link, effect. I love the way it turned out!

purple ombre chain link lace stamped manicure

 I actually attempted double stamping but it just wasn't working out, the black wasn't popping over the deep purple tones. I'll save that for another manicure!

purple ombre gradient manicure
The base for my stamping.

An off-topic question today: what cuticle treatment do you use? Despite regular oil use, mine are a little ragged!

xo Shawna

Sunday, August 31, 2014

Gray & Yellow Lace Manicure

Tonight's mani was a quickie! My nails are going to get wrecked tomorrow so I played around with some of my new colours and plates. 


Colours used are NYC in Sidewalkers and Lexington Yellow. The gray had good, smooth coverage in two coats whereas the yellow was three coats and still a little streaky. I used wet n' wild in black creme for the stamping.  I used a born pretty stamping plate (item # 6455) for the lace details. 


I need more practice centering but I really liked the look of the lace down the centre of the nail! 

Hope you like it :)
xo Shawna 

Saturday, August 30, 2014

My Nail Polish Organization

I was excited to be able to get out to Ikea today to pick up a Kallax insert for my Expedit shelf. (They recently changed the Expedit line to Kallax - It's slightly thinner and therefore uses less material = more eco conscious). I've been eyeing one since my polish collection started outgrowing my previous storage, shortly after I wrote the post on my polish stash!

Ikea nail polish storage KALLAX

It wasn't too difficult to put the unit together, although once I finished I realized I could have gotten use out of my fiancés power drill! Probably best I stayed away from the power tools, though - I'm definitely not handy. 

Ikea nail polish storage KALLAX

In the top drawer, I have all my nail art supplies. This consists of: my black & white polishes for stamping, my Ciate caviar beads, rhinestone wheel, nail wraps, nail decals, stamping plates & scrapers, brush set, dotting tool, orange wood cuticle pushers, feathers, files and a few other odds & ends. 

Ikea nail polish storage KALLAX

My polish drawer was loosely organized by colour. Base/ top coats and nail treatments in the back! 

There's a few other great storage solutions for polish from Ikea including the Helmer (the gold standard for polish collections, I think!) and the Alex. I would love a Helmer however there is just no where else to cram another storage unit in my condo! 

What's your storage look like? Do you organize by brand or by colour?

xo Shawna

Thursday, August 28, 2014

Romantic Stripes & Sparkles

My friend and I are at a yoga retreat centre for a few days of R&R. Of course this means we brought a bunch of nail supplies (she's one of my few friends who shares my nail polish obsession!) and got painting on our first night here. I wasn't sure what I had in mind when we started, but I wanted to try my new essie "Mint Candy Apple" so I laid down a base of that. 2 coats was fairly opaque (not perfectly so) but enough! 

Romantic Stripes & Sparkles manicure

I tried a few rosettes but they were sad looking so I wiped that off and did accent nails in OPI "Panda-monium Pink" (one of my fave shades and sadly discontinued). 

Romantic Stripes & Sparkles manicure

I used my striping brush and dotting tool to make each nail different. The white is Ciate "Snow Virgin". My chevrons on the right hand are not nearly as straight! 

Romantic Stripes & Sparkles manicure

Lastly, the accent nails needed a little bling so I added some rhinestones from born pretty store and two coats of a Sally Beauty glitter, finished off with a coat of HK Girl. Done! I didn't love it at first but it's definitely grown on me. I love the romantic colour palette! 

girls night nail art party

Do you like to mix and match patterns or keep everything uniform?

xo Shawna  


Sunday, August 24, 2014

Birds on a Wire Stamped Mani

Tonight's mani has booted out my Paris nails as my new favourite! As soon as I saw the Birds on a Wire on the MoYou Pro Plate #4 I knew it was a must have. The only thing that prevented me from using it earlier was a fear of the fine line work, so I wanted more practice first! 

Birds on a wire Ombre Stamped Mani

First, I created a gradient with:
China Glaze - Naked
L'oreal - Orange You Jealous
Sally Hansen - Pacific Blue
I was going to use an Essie shade in lieu of Pacific Blue but the colour was just too sheer to be really noticeable and I wanted more.

Birds on a wire Ombre Stamped Mani

Next, I used Wet n' Wild Black Creme for the stamping. I paired the delicate (illegible) text from the same plate with the bird image.

Birds on a wire Ombre Stamped Mani

I absolutely love the way this one turned out. The ombre effect on my thumbs are less than perfect - I figure my thumbs are kind of like the first pancake - a write off. 

Birds on a wire Ombre Stamped Mani

Do you have issues getting your thumbs sponged as nicely as the rest?

xo Shawna

 
Images by Freepik